Showing posts with label stampin' Up. Show all posts

Wednesday, March 30, 2016

Be a part of awesome! Inspiration, stamping, prizes GALORE! BONUS superhero video!

Pretties Team Gathering Recap! 


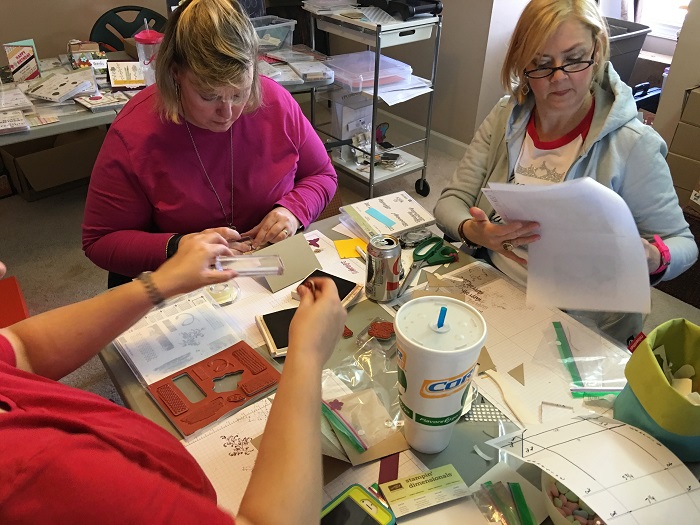
Our Pretties Team gathers once a month for stamping, food, fun, prizes, business training and most of all - laughter! This 2 hours on Saturday is the highlight of my month where my papermadeprettier Stampin' Up business is concerned. These ladies bless me daily with their inspiration, kindness and creativity! In 3 short years we have grown from one to now 33 members (all 3 level downlines included) and I am proud to say that at times 1/3 or so can attend my local gathering! (We periscope in the out of towners!)

Curious about whether we have FUN?  Check out our team video!


First we oogle over displays and samples:


We show and tell our Creative Challenges! (PRIZES of course!) This month the theme was flowers!


My other favorite activity is swaps (optional) yet FUN!!!!!


We do some quick business training,share our achievements (mickey ears optional!) and we have two FAB product demonstrations:


Then we STAMP! Of course!!!! 


Here's what we made in May 2016 (thanks to Ronda Wade- Creating Success Training Group and her fab meeting planners and designs!!!). Selene Kempton designed these cuties! I only charge a $5 materials fee and I'd say it's worth it, wouldn't you???


Remember when I said Prizes! There are TONS! These are just a few of the happy winners from our May team gathering! 


Here are the swaps and creative challenges up close! -minus the On Stage Swap (excuse the lighting, I just take these at my team gathering on the fly!)


Want to be a part of awesome? The people are what makes it so fun. Want to know what else is awesome? With your starter kit you get $155 for only $99!!! BUT THIS DEAL ENDS 3/31 at Midnight when Saleabration Ends!

Click here to select your starter kit in just a few minutes TODAY! 
Call me 501-831-0413 or email me and I can help you choose your kit!  
Want more info on the benefits of being a Stampin' Up happy shopper?  Click here! 

Wednesday, October 30, 2013

5 Thankful days of Thanksgiving projects from papermadeprettier, project #4

Welcome back to my series of ten precious Stampin' Up Thanksgiving projects to wow amaze you. If you missed the first 2 projects, click here: 5 Thankful Days Project #1.  I will post two projects a day for 5 days so that when you love them and want to make them, you will have plenty of time to make yours before the turkey comes to town! 

DAY 2:
Project #4
Happy Thanksgiving Card:


This 5"x5" beauty was designed by Mary Fish, another very talented demonstrator.  I had to copy it exactly because it was so beautiful. My favorite part of the card is the envelope made with our envelope punch board and lined with the fabulous sweater weather designer series paper. Also, see how she had the idea to pinch the image in crushed curry, trim out the "thanks" word adhere to the punched image? Brilliant!

 
I might add, the Tags 4 You is my favorite set in the holiday catalog since it covers all the most fabulous holidays this time of year and a little to:/from: stamp which is also fab. This is also coordinates with the label bracket punch which are bundled to save you 15%!!


Stampin' Up supplies used:
paper: 8 1/2" x 11" chocolate chip, very vanilla cardstock, sweater weather designer series paper. stamp set: Tags 4 you.
ink: chocolate chip, crushed curry
embellishments: chocolate chip button (neutrals collection), 1 1/4" burlap ribbon
tools: envelope punch board, label bracket punch
adhesives: snail adhesive, glue dots, stampin' dimensionals

Check out Stampin' Up's YouTube video about the fabulous envelope punch board: http://www.youtube.com/watch?v=JzokPixtpko

Details:
Cut chocolate chip paper 5 1/2 x 11, fold in half.  These are the dimensions of the rest of the layers:
tangerine tango sweater weather paper 4 1/4" x 4 1/4"
very vanilla paper: 4" x 4"
crushed curry sweater weather designer paper 3 1/2" x 3 1/2"
herringbone strip sweater weather 3 1/8" x 1"
tangerine tango sweater weather strip 3 x 3 3/4"
Layer papers with snail adhesive, cut a triangle out of the end of your strips (have a square punch? This works great - or fold and freehand like me!).  Layer strips with snail. cut burlap ribbon narrower and layer with tape or glue dots.  Stamp Tags 4 U "Happy Thanksgiving" in both chocolate chip and crushed curry. Punch chocolate chip with the label bracket punch. Trim the "thanks" with scissors out of the crushed curry stamped image and use snail to adhere to the punch.  Adhere to card with stampin dimensional (I only used on one side since the ribbon forced the other side up a little). Now finish it off with a precious chocolate chip button!  Mary used the fabulous antique brads which I did not have, so I guess I fibbed. I did not copy exactly!!!
See video for envelope punch board. I just made a smaller envelope to put inside the larger envelope with the punch board.

DON'T miss project #5 tomorrow!  Subscribe to my blog so you won't miss a thing!  www.papermadeprettier.com.

To order these fabulous products online anytime, go to my online store: http://www.stampinup.com/ECWeb/default.aspx?dbwsdemoid=2006013

Questions? Email me: Kay Cogbill, papermadeprettier Stampin' Up Demonstrator
cogbill22@yahoo.com

Tuesday, October 29, 2013

5 Thankful Days of Thanksgiving projects from papermadeprettier: Project #1


Welcome to my series of ten precious Stampin' Up Thanksgiving projects over 5 days to wow amaze you!  My name is Kay Cogbill, I am a Stampin' Up demonstrator and I am here to wow you with my Thanksgiving eye candy. Don't you find that Thanksgiving decor is often snuggled on the endcap of the aisle between the Halloween candy and Christmas goodies?  Thanksgiving is about being with those that we love an being thankful for them. What better way to show them you care than a handmade card or gift? These projects are EASY TO MAKE and FABULOUS and are all available through my online store.  I found most of these projects on Pinterest and sometimes tweaked them with a little papermadeprettier sparkle and dazzle. I will post two projects a day for 5 days so that when you love them and want to make them, you will have plenty of time to make yours before the turkey comes to town! 

SUBSCRIBE TO MY BLOG DURING THIS SERIES AND I WILL EMAIL YOU A PDF WITH INSTRUCTIONS FROM ALL OF THE PROJECTS LISTED HERE!!!

DAY 1
Pumpkin Treat Box:


This beauty was inspired by Debbie Henderson, who indicated on her blog that it was inspired by others on Stampin' Connection. Either way, it's fabulous!!! I added a little sparkle with the champagne glitter paper paper, LOVE!

Stampin' Up supplies used both from annual and holiday catalogs:
paper: 8 1/2 x 11 pumpkin pie card stock, champagne glimmer paper.
ink: early espresso.
Big Shot: circles collection thinlits, autumn accents bigz die, chevron embossing folder. embellishments: burlap ribbon, gumball green 3/8 " stitched satin ribbon, early espresso button (neutrals collection), linen thread.
adhesives: sticky strip adhesive, glue dots
other: stampin' sponge

Project details:
Use circles thinlit to cut the large scalloped circle. Run these each through the bigshot in the chevron embossing folder.  Trim off the edge of both.  The box inside is made with a piece of pumpkin pie card stock cut at 5" x 5 1/2". Score long edge 1 inch in from edge on both sides. Score short side 2 inches in on either side.

Fold into a rectangular box and affix with double stick tape or sticky strip.  Use glue dots to affix gumball green ribbon to burlap ribbon and glue these to the inside of the pumpkin with sticky strip.  Cut champagne glittered leaves with autumn accents die. I sponged the edges of the glittery leaves with chocolate chip ink, just needed softening, I though. Thread linen thread through the early espresso button, adhere to the leaves with glue dots and adhere leaves with glue dots to the front of the pumpkin. PRECIOUS, RIGHT???

DON'T miss project #2 later today!  Subscribe to my blog so you won't miss a thing!  www.papermadeprettier.com.

To order these fabulous products online anytime, go to my online store: http://www.stampinup.com/ECWeb/default.aspx?dbwsdemoid=2006013

Questions? Email me: Kay Cogbill, papermadeprettier Stampin' Up Demonstrator


Friday, October 25, 2013

Fabulous Stampin' Up card using heat emboss-resist technique with Feel Goods, Positively Chevron, and En Francais stamp set

Heat Emboss Resist Technique 

I believed I could do this technique and discovered that I could!  You can too! Here's how:
 

Steps:
1. Cut calypso coral card stock at 5 1/2 x 4 1/4 for base, fold
2. Cut whisper white 5 1/4 x 4 for layer
3.  Ink En Francais background stamp with calypso coral ink, stamp on white layer
4.  Ink Positively Chevron background stamp with Versamark pad, sprinkle clear embossing powder, heat with heat gun


5.  Sponge calypso coral ink onto the parts of the white layer that are not embossed, the embossing will resist the ink (wipe of excess). Now the wording will show through the embossed part and not the part that you sponged! (see close up below) COOL!

 
6. Use Labels Framelits to cut out a calypso coral piece and whisper white piece one sized smaller
7. Stamp "She Believed...." on white frame. Layer white on coral with stampin' dimensionals, adhere to card
8. Tie chevron calypso coral around the white layer, affix to the base
9. As always, stick a rhinestone on!!! 


Shop 24/7 for stampin' supplies in my online store, here! 
 
 
Find my upcoming events! in Little Rock, Arkansas!
 
Follow papermadeprettier on Pinterest and Facebook!
 
To hostess an event in the Central Arkansas area, email me cogbill22@yahoo.com 


Related Posts Plugin for WordPress, Blogger...