DAY 4:
Project #7
THANKFUL JOURNAL
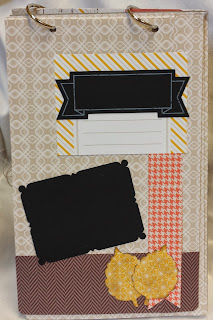
I got this fabulous idea from convention. It's a stepped-up project using the Thankful Tablescape Simply Created Kit. Isn't it dreamy? I love the way all of these elements meld together. Here are the inside pages with photos!
Stampin' Up supplies used: (all but the naturals designer buttons, Truly Grateful stamp set, chocolate chip ink and stampin' sponge to soften up the leaf cuts were from the Thankful Tablescape Simply Created kit!)
paper: whisper white 8 1/2" x 11", sweater weather designer series paper, If you don't have the kit (WHY DON'T YOU? IT ROCKS!) you can use sweater weather designer series paper and the autumn accents bigz die, however, the chalkboard cut out black pieces are exclusive to the kit.
stamp sets: Truly Grateful
Big Shot: autumn accents bigz die (if you don't use the kit), bitty banners thinlit
ink: chocolate chip
embellishments: naturals designer buttons
adhesives: snail adhesive, stampin' dimensionals
misc: stampin' sponge, white stampin' chalk marker?, metal rings x 2
Details:
Cut cardboard piece that was in the Thankful Tablescape kit in half on the long end making the cardboard front and back covers (waste not, want not, right???). Round the bottom edges with scissors. Stack 2 halves back to back and punch 2 holes equal distance from edge through both halves (I used the cropadile tool - not Stampin' Up). Front and back covers: cover front and back covers on both the front and back with the sahara sand/white paper. On front cover, layer a piece of birch paper. Cut 1 strips of designer paper and cut the edge off of one of the "list" pieces with crushed curry diagonal stripes and cut an inverted "v" edge and layer the designer series papers strips. Fold chocolate chip herringbone paper strip over on itself multiple times using glue dots on the inside to secure until it reaches from one side to the other, affix to front with glue dots. Tie 3 pieces of linen thread around the journal in a bow. Glue dot a naturals designer button on the knot of the bow. Cut whisper white card stock using bitty banners thinlit die, stamp "thankful for" in chocolate chip ink. Write "journal" with stampin' chalk marker. Layer papers on other pages as desired. Some examples are shown above.
DON'T miss project #8 this afternoon! Subscribe to my blog so you won't miss a thing! www.papermadeprettier.com.
To order these fabulous products online anytime, go to my online store: http://www.stampinup.com/ECWeb/default.aspx?dbwsdemoid=2006013
Questions? Email me: Kay Cogbill, papermadeprettier Stampin' Up Demonstrator
cogbill22@yahoo.com


No comments:
Post a Comment
I'd love to hear what you think, or answer any question! Comment away!