Showing posts with label treat box. Show all posts

Wednesday, October 11, 2017

12 Days of Halloween - Day 4 Owl Pizza Box


Owl do you make this cute box? Easy, of course! With Stampin' Up's new Pizza Boxes! This project features the Spooky Cat stamp set and the Spooky Fun 12 x 12 Designer Paper. The owl from the stamp set is designed to perch right on the branch perfectly. SQUEAL! You could also perch a punched cat on the branch if you'd like. I finished it off with a Very Vanilla Banner stamped with the most adorable "Trick Or Treat" sentiment ever. 

Pizza Boxes are divine! They also hold a 3x3 stack of cards perfectly :)
Click here to purchase yours


Spooky Fun paper:


Spooky Cat stamp set:


I'd love to see your pizza box creations posted in the comments on this post!

Product List:

Spooky Cat Stamp Set (photopolymer) #144794 $17
Spooky Night Designer Series Paper #144619 $11
Mini Pizza Boxes #144655 $6 (8 boxes per pack)
Very Vanilla Card Stock #101650  $9
Archival Black Ink #140931 $7
Archival Black Refill #140928 $5.50
Stampin' Dimensionals #104431 $5

I love how the Spooky Night suite of products just goes on and on with possibilities! 


12 Days of Halloween Day 1- Spooky Cat Treat Box
12 Days of Hallween Day 2 - Pick Your Potion Card
12 Days of Halloween Day 3 - Creep it Real Card
12 days of Halloween Day 4 - Owl PIzza Box
12 Days of Halloween Day 5 - Spookalicious Pizza Box
12 Days of Halloween Day 6 - Toil and Foil Creep It Real Card
12 Days of Halloween Days 7-10 Halloweenpalooza

HOLIDAY CATALOG: Click here to see the current Holiday Catalog 2017
SHOP: Click here to shop online today!
HOST: Email me to schedule your own private class with friends today
BE A HAPPY SHOPPER: Get the best deal on all your crafty goodies. Click here to find out more

Wednesday, May 4, 2016

Apple of My Eye.......It's Goodbye! BUT get it in the CLASS TO GO!


Apple of My Eye CLASS TO GO! 

Spring has sprung, y’all, so my class space is limited. Also, I'm cruising to the Mediterranean at the end of May, so my month is extra tight! So is your time! I have the perfect solution!!!

 A CLASS TO GO!
Don’t miss this adorable set that is retiring! Apple of my EYE!  

The class fee of $35 includes: 
  •  The adorable stamp set (make it at your leisure!)
  • 4 cute projects: 1 card, and 3 gifts (perfect for end of year and teacher gifts!!!) 
Local pick up or add $6 for shipping. RSVP with prepayment due 5/9. Kit will ship on 5/20!
Email or FB message me to RSVP! cogbill22@yahoo.com


Shop 24/7 for all your stampin' supplies in my online store, here!   If you spend $150, you get FREE goodies!!!

Save BIG! for the BEST DEAL! Join my papermadeprettier team of happy shoppers!  It's $125 in merchandise of  your choice for only $99 AND free shipping! plus 20% on all future purchases! Plus ME as your creative coach for whatever you want to do!

Host To hostess an event in the Central Arkansas area, email me cogbill22@yahoo.com


Sign up for my email newsletter and don't miss creative inspiration, regular updates, tutorials, and special offers from papermadeprettier (Kay Cogbill)!

Monday, May 5, 2014

Tag Topper "WOO HOO!!!" treat holders - perfect for spring celebrations!


Spring is here!!! that means graduation, prom, Mother's Day, teacher gifts... You name it, there are plenty of reasons to celebrate. My father retired from 40+ years as a CPA this weekend.  HOORAY for dad!  My sister and I (also a Stampin' Up demo) cooked up some decoration ideas for the shindig the night before (EEK!). I set out to make treats and a scrapbook in 24 hours. I may show you the scrapbook later, but FYI, I finished it!  I love a good challenge. I can't believe I did it!!!  These little candy treat holders (there is a Hershey nugget inside) took me about 1 hour to make. They are seriously easy!!!  You could adapt for any celebration. My dad likes photography, so his camera is saying "WOO HOO!". 

The must have tool for this DIY treat holder is the tab topper punch. It comes in either scalloped or angled types.

CLICK THE PICTURE TO GO TO MY ONLINE STORE AND BUY IT NOW!


Here are some other goodies I have made with these punches:


Stampin Up supplies used:
stamps: Just Sayin'
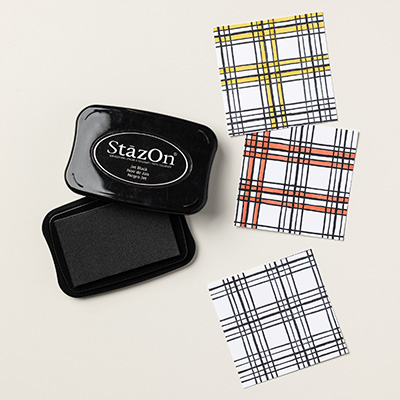
ink: black stayzon ink pad132
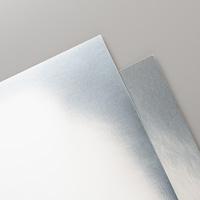
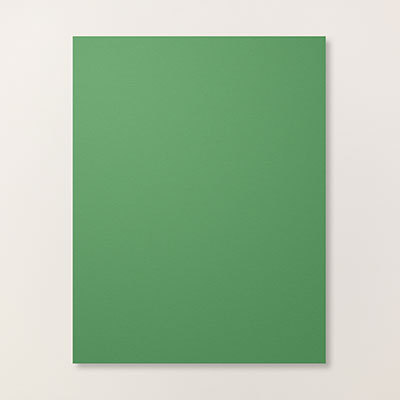
paper: garden green 8 1/2 x 11 card stock, whisper white card stock, silver foil 12x12 paper
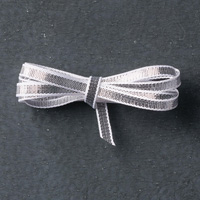
embellishments: silver 1/8" ribbon
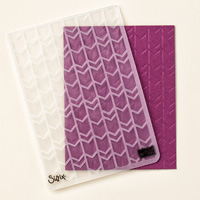
tools: angled tab topper punch, arrows textured impressions embossing folder, Word Bubbles framelit dies, On Film framelit dies
 
Directions:
Cut garden green paper at 7" x 2" and score at the 3" and 4" mark. Run through BigShot in arrows embossing folder (a little bit of the back won't emboss, that's ok!)  Stamp saying on white paper then cut out with on film framelit. Cut out silver camera with frame lit. Attach to front with dimensional then attach word bubble with snail adhesive. Tape candy in with double sided tape.  Fold treat holder on score lines and tie with silver ribbon. Simple and wonderful!  
 
SUPPLIES:
Table by StampinBuddy. Try it FREE.

Don't miss another project inspiration!!!  Subscribe to my blog today!

Want a complimentary copy of the new catalog coming VERY SOON? Email me today cogbill22@yahoo.com

Shop 24/7 for stampin' supplies in my online store, here! 

Join my papermadeprettier team!

Find my upcoming events! in Little Rock, Arkansas!

Follow papermadeprettier on Pinterest and Facebook!

To hostess an event in the Central Arkansas area, email me cogbill22@yahoo.com.
 

Wednesday, October 30, 2013

5 Thankful days of Thanksgiving projects from papermadeprettier, project #3

Welcome back to my series of ten precious Stampin' Up Thanksgiving projects to wow amaze you. If you missed the first 2 projects, click here: 5 Thankful Days Project #1I will post two projects a day for 5 days so that when you love them and want to make them, you will have plenty of time to make yours before the turkey comes to town! 

DAY 2:
Project #3
Thankful Window Treat Box


This cute little bundle of chocolate love designed by hand stamped style and tweaked and copied by me :).  I am so THANKFUL for others who share their ideas on different sites.  I used the leaf and black place card label with chalkboard marker from the Simply Created Thankful Tablescape kit which I LOVE!!!  There's enough in that kit to create 10 place settings or to use the sweet items to make other things, which is what I did! 

(this is a bonus project, made entirely from the kit - except the cutie card which you will see later :)
 

Thankful Window Treat Box Stampin' Up supplies used:
paper: 8 1/2" x 11" crumb cake, sweater weather designer series paper leaf die cut from thankful tablescape kit (OR cut one out from the sweater weather paper and autumn accents bigz die), black chalkboard label
Big Shot: Thinlit circles collection
embellishments: cajun craze button (regals button collection),white stampin' chalk marker (sold separately or included in Thanksful Tablescape kit) linen thread (in kit or sold separately), envelope punch board.
adhesives: glue dots, sticky strip
 

Here's a cool tutorial about how to make the treat box with the envelope punch board (WHICH YOU NEED TO BUY!!!). Just goodle, Pinterest search Stampin' Up envelope punch board. The opportunities are endless!

Check out Stampin' Up's YouTube video about the fabulous envelope punch board: http://www.youtube.com/watch?v=JzokPixtpko

Details:
Create treat box using tutorial video instructions provided above.  Use big shot circles thinlit die to cut circle in the middle of the square part (you will need to make sure to cut only one side of your box, not the flaps - just face the flaps up and not towards cutting edge of thinlit, imagine the thinlit is inside the box).  Thread linen thread through button and tie bow. Adhere to leaf and then to box with glue dots.  I used a little cello bag and put M&M's from Target which were fall colored, then sticky strip taped the box shut.

DON'T miss project #4 this afternoon!  Subscribe to my blog so you won't miss a thing!  www.papermadeprettier.com.

To order these fabulous products online anytime, go to my online store: http://www.stampinup.com/ECWeb/default.aspx?dbwsdemoid=2006013

Questions? Email me: Kay Cogbill, papermadeprettier Stampin' Up Demonstrator

Tuesday, October 29, 2013

5 Thankful Days of Thanksgiving projects from papermadeprettier: Project #1


Welcome to my series of ten precious Stampin' Up Thanksgiving projects over 5 days to wow amaze you!  My name is Kay Cogbill, I am a Stampin' Up demonstrator and I am here to wow you with my Thanksgiving eye candy. Don't you find that Thanksgiving decor is often snuggled on the endcap of the aisle between the Halloween candy and Christmas goodies?  Thanksgiving is about being with those that we love an being thankful for them. What better way to show them you care than a handmade card or gift? These projects are EASY TO MAKE and FABULOUS and are all available through my online store.  I found most of these projects on Pinterest and sometimes tweaked them with a little papermadeprettier sparkle and dazzle. I will post two projects a day for 5 days so that when you love them and want to make them, you will have plenty of time to make yours before the turkey comes to town! 

SUBSCRIBE TO MY BLOG DURING THIS SERIES AND I WILL EMAIL YOU A PDF WITH INSTRUCTIONS FROM ALL OF THE PROJECTS LISTED HERE!!!

DAY 1
Pumpkin Treat Box:


This beauty was inspired by Debbie Henderson, who indicated on her blog that it was inspired by others on Stampin' Connection. Either way, it's fabulous!!! I added a little sparkle with the champagne glitter paper paper, LOVE!

Stampin' Up supplies used both from annual and holiday catalogs:
paper: 8 1/2 x 11 pumpkin pie card stock, champagne glimmer paper.
ink: early espresso.
Big Shot: circles collection thinlits, autumn accents bigz die, chevron embossing folder. embellishments: burlap ribbon, gumball green 3/8 " stitched satin ribbon, early espresso button (neutrals collection), linen thread.
adhesives: sticky strip adhesive, glue dots
other: stampin' sponge

Project details:
Use circles thinlit to cut the large scalloped circle. Run these each through the bigshot in the chevron embossing folder.  Trim off the edge of both.  The box inside is made with a piece of pumpkin pie card stock cut at 5" x 5 1/2". Score long edge 1 inch in from edge on both sides. Score short side 2 inches in on either side.

Fold into a rectangular box and affix with double stick tape or sticky strip.  Use glue dots to affix gumball green ribbon to burlap ribbon and glue these to the inside of the pumpkin with sticky strip.  Cut champagne glittered leaves with autumn accents die. I sponged the edges of the glittery leaves with chocolate chip ink, just needed softening, I though. Thread linen thread through the early espresso button, adhere to the leaves with glue dots and adhere leaves with glue dots to the front of the pumpkin. PRECIOUS, RIGHT???

DON'T miss project #2 later today!  Subscribe to my blog so you won't miss a thing!  www.papermadeprettier.com.

To order these fabulous products online anytime, go to my online store: http://www.stampinup.com/ECWeb/default.aspx?dbwsdemoid=2006013

Questions? Email me: Kay Cogbill, papermadeprettier Stampin' Up Demonstrator


Related Posts Plugin for WordPress, Blogger...