Showing posts with label big shot. Show all posts

Friday, May 2, 2014

It's FINALLY HERE! Project Life Everyday Adventure from Stampin' Up!

 
Get a look at the dog....he's even got a bit of confetti to sport! 
 
 
There's the cute confetti pocket! Obviously had to do it!


Project Life by Stampin' Up: Everyday Adventure

My Everyday Adventure Project Life Card Collection and Accessory Pack arrived the DAY I went to the catalog premiere. When I arrived home at 1:30 am, don't think I didn't consider jumping right in. I did wait, but it was sheer torture! I'm so excited to show you my first OFFICIAL Project Life by Stampin' Up product line creation!  These pictures scrolled across my Facebook page from our previous, most beloved, dear neighbors and when I saw the confetti on the dog, I knew I had to create a page for them! What fun it was! Some of my favorite details are the coordinating colors (basic black, bermuda bay, crushed curry, pear pizzazz, pumpkin pie, strawberry slush and whisper white) and accessories which just round it off perfectly! I HAD to make a confetti pocket, and let's face it.. I don't have a sewing machine - YET. I figured out a way to make a confetti pocket with a Stampin' Up clear envelope.  I'll you how in a blog post soon.

What sets Stampin Up project life products apart from retail stores, what is project life, how can I get a 20% discount on Project Life supplies?  Click here to go to my Project Life page to find out.


Here's all the goodies that are on sale so far. To see them up close, click the picture and it will take you to my online store.


Stampin' Up supplies used:
stamps: Project Life Point and Click, Project Life Day to Day, Hip Notes
ink: Project Life journaling pen
paper: Everyday Adventure Project Life Card Collection
tools: Project Life Corner Punch, word bubbles framelit (Occasions catalog and 2014-2015 catalog woo hoo!)
embellishments: brights designer buttons, gold sequin trim, glimmer brads (brights), Everyday Adventure accessory pack
other: clear envelopes (medium size), variety pack 12x12 Project life Photo Pocket Pages
 
Directions: round corners of photos and journaling tags.  Photos are either 4x6 or 2x3. I split the wreath on a door between two boxes, which I love.  Embellish as shown. The names above the precious children are stickers from the Everyday Adventure accessory pack.  Stamp "hip hip hooray and the arrow through the heart on white scraps, then cut out with word bubbles framelits. Stamp date on a card. It's hard to see on the picture, but I ran the gold sequin trim across two sections. My last fun detail is that the arrow from the accessory kit points to the parade they went to.
 
Memory keeping was never this fun and easy!  Give it a try!  I'll be teaching a class on this June 21st in Little Rock, Arkansas OR you can buy my class kit to go if you are not local.   

Don't miss another project inspiration!!!  Subscribe to my blog today!

Want a complimentary copy of the new catalog coming VERY SOON? Email me today cogbill22@yahoo.com

Shop 24/7 for stampin' supplies in my online store, here! 

Join my papermadeprettier team!

Find my upcoming events! in Little Rock, Arkansas!

Follow papermadeprettier on Pinterest and Facebook!

To hostess an event in the Central Arkansas area, email me cogbill22@yahoo.com.

Thursday, November 14, 2013

12 days of Stampin' up Christmas projects from papermadeprettier, DAY 9

I could not wait to get my hands on this FLIP CARD thinlit die from Stampin' Up. If you have never seen how they work, you must watch this video.  A flat picture of one just does not do it justice. Check out this you tube video to see how cool these flip cards are in action!

Day 9
Flip over Santa card!

 Front of card:
 
opens to this:
 
 
Don't forget the snazzy envelope liner!


Stampin' Up supplies used:

Paper: whisper white, cherry cobbler 8 1/2" x 11" card stock, season of style designer series paper, champagne glitter paper
Stamp sets: Merry Little Christmas, Color Me Christmas, Oh Goodie!
ink: Cherry cobbler a nd old olive stampin write markers, old olive and basic black classic ink pad
tools: 2 1/2" circle punch
Big Shot: envelope liner die, circle card thinlit die

Details:
Cut cherry cobbler base with circle card thinlit die.  Cut designer paper with thinlit and trim edges a bit to layer on top of base. Color stamp with red and green markers, stamp on white paper and punch with circle punch.  Cut two gold stars with thinlit die.  Color and stamp the "little" part of the "Have yourself.." on white, cut out and trim to place on the white circle for a little extra flair!  adhere to front circle of card.  Stamp santa in black on white card stock. Color with markers. Punch with 2 1/2" circle punch and adhere to flip side of card.  Attach stars to card and to each other with glue dots so the white backs do not show. Stamp "ho ho ho" on white strip of cardstock and adhere to base with snail adhesive. Cut envelope liner with thinlit. Adhere with snail adhesive.


Missed day 1?  It's here.  Don't miss a day! subscribe to my blog today

Order stampin' supplies here at my online store 24/7.

Like papermadeprettier on Facebook and Pinterest!

Wednesday, November 13, 2013

12 days of Stampin' up Christmas projects from papermadeprettier, DAY 8

The suspense is over, here's what was in yesterday's bag. Beautiful cards!  I made these at my downline Becky Liggin's stamp camp. Aren't they fabulous? The frosted finishes embellishments are the perfect embellishment for these fabulous cards.


Day 8:
Joyful Christmas Poinsettia Christmas cards


 Stampin' Up supplies used:
Paper: chocolate chip, old olive, cherry cobbler and whisper white 8 1/2" x 11" card stock; season of style designer series paper, Regals core'dinations card stock (cherry cobbler)
Stamp set: Joyful Christmas
Ink: cherry cobbler, old olive classic stampin' pads, white craft pad (or metallic encore silver pad if you don't have the old white pad)
Big Shot: pretty print and petals a plenty textured impressions embossing folders, apothecary accents framelit
embellishments: frosted finishes embellishments, basic rhinestones
ribbon: cherry cobbler baker's twine
adhesives: snail adhesive, stampin' dimensionals, glue dots
other: season of style washi tape, gingham garden washi tape, blender pens, stampin' sponge, stampin' sanding block
 
Details:
Details:
cherry cobbler base cut 5 1/2" on long end and fold
old olive 5 1/2 " x 3 3/4", emboss with petals a plenty embossing folder
red/white striped season of style 4 1/2" x 2 1/4"
whisper white rectangle: 2 1/2" x 1 1/2", stamp with saying and sponge cherry cobbler ink on edges
stamp whisper white onto cherry cobbler and trim with scissors. Embellish with frosted finishes using a glue dot. Wrap cherry cobbler around olive piece 3x and then tie in a bow. Layer all pieces with snail adhesive, except on rectangle square, use stampin' dimensionals.

Details:
Cut chocolate chip on long end at 5 1/2" and fold
Whisper white layer 4" x 4", emboss with pretty print embossing folder
Season of style striped paper: 4" x 1 1/2"
rectangles: cherry cobbler: 2 1/2" x 1 1/2", whisper white: 2 1/4" x 1 1/4"
stamp whisper white with "joyful" using cherry cobbler ink.  Stamp whisper white onto cherry cobbler for poinsettias and old olive with leaves and cut with scissors. Layer white and striped piece using season of style washi tape where they meet. Layer the rest with snail adhesive except poinsettia using stampin' dimensionals.  Embellish flower with frosted finishes embellishment.

Details:
Cut cherry cobbler at 5 1/2" on long end and fold.  Cut old olive at 5 1/4" x 4". Cut whisper white at
5" x 3 3/4".  Cut cherry cobbler piece behind white rectangle using apothecary accents framelit, cut strip of cherry cobbler 5" x 1/2", cut striped piece 5" x 1"
Stamp large white piece with poinsettia stamp using cherry cobbler ink. Use cherry cobbler ink and blender pen to color the poinsettias.  Color center with old olive ink. Embellish one with basic rhinestone and one with frosted finishes embellishment.  Stamp "Joyful..." with cherry cobbler and layer onto apothecary accents piece then layer all pieces with snail adhesive.

Details:
Cut old olive piece at 5 1/2" on long end and fold.  Cut cherry cobbler core'dinations card stock piece at 5 1/4" x 4", emboss with pretty print embossing folder. Sand with stampin' sanding block.  Adhere gingham garden washi tape across cobbler piece.  Cut white rectangle at 3 1/4" x 3". Stamp with leaves and "joyful" using old olive and cherry cobbler ink.  Edge with washi tape, embellish with frosted finishes using a glue dot.  Layer all with snail adhesive.


Missed day 1?  It's here.  Don't miss a day! subscribe to my blog today

Order stampin' supplies here at my online store 24/7.

Like papermadeprettier on Facebook and Pinterest!

Tuesday, November 12, 2013

12 days of Stampin' up Christmas projects from papermadeprettier, DAY 7

I love giving packets of handmade cards as gifts at Christmas.  These chevron bags are the perfect size for cards or any other goodies you want to give at Christmas.  I also love the holiday single stamp collection (not in either catalog). The bags are neutral and can be dressed up for any holiday!


Day 7:
Chevron Gift Bag:


 Stampin' Up supplies used:
Tag a bag gift bags
Paper: whisper white 8 1/2" x 11" card stock
Stamp set: Tags 4 you, Wonderful Blessing (single holiday stamp)
Ink: cherry cobbler, gumball green, chocolate chip, crumb cake stampin' write markers, cherry cobbler classic ink pad
Big Shot: circles collection thinlit die
embellishments: washi tape, basic rhinestones
tools:label bracket punch

Details:
Color "Wonderful Blessing" stamp with markers, cut out with BigShot circles thinlits collection die.  Attach rhinestone on star. Stamp "A gift for you" on whisper white with cherry cobbler. Punch with label bracket punch. Affix to bag with stampin' dimensional. Fold bag over and adhere washi tape across top edge.  Use snail adhesive to attach circle to flap.

Guess what's IN the bag?  Stay tuned for day #8!  Missed day 1?  It's here.  Don't miss a day! subscribe to my blog today

Order stampin' supplies here at my online store 24/7.

Like papermadeprettier on Facebook and Pinterest!

Monday, November 11, 2013

12 days of Stampin' up Christmas projects from papermadeprettier, DAY 6

Arrows and ampersands are so hip and fresh, I just had to use them for the holidays in this SIMPLE card using Stampin' Up products. This card hit me on the way to work one morning. I love it!  Bling and ring, Christmas is coming!


Day 6:
Arrows and Ampersands Christmas:


And don't forget the lined matching envelope!

 
Outside of envelope:


 Stampin' Up supplies used:
Paper: whisper white 8 1/2" x 11" card stock, brights designer series paper stack (envelope liner)
Stamp set: Hello Lovely, Teeny Tiny Wishes, Oh, Goodie!
Ink: real red and coastal cabana stampin' write marker
Big Shot: envelope liner die
embellishments: basic rhinestones
other: whisper white medium envelope

Details:
Cut whisper white on long end at 5 1/2" and fold. Stamp arrows in rows, alternating in colors as shown adding row of basic rhinestones (was really wanting to use those rows of rhinestones somewhere!) and row of "ho ho ho".  Stamp ampersand in lower right corner leaving room for "Merry Christmas" and "Happy New Year". Stamp "Ho Ho Ho" in lower left corner and finish off with arrows in lower right corner.  Embellish with more rhinestones. Just realized, so far all of my projects have sparkles somewhere!
 
Stay tuned tomorrow for day #7. Missed day 1?  It's here.  Don't miss a day! subscribe to my blog today

Order stampin' supplies here at my online store 24/7.

Like papermadeprettier on Facebook and Pinterest!

Saturday, November 9, 2013

12 days of Stampin' up Christmas projects from papermadeprettier, DAY 4

 
 Welcome to day 4!  The winter frost designer series paper is just so pretty.  If you missed the card yesterday, make sure to check it out. Now for an ornament. You can NEVER NEVER have too many ornaments. If you run out of room, get another tree!  That's exactly what Clark Cogbill says, NOT! 
 

Day 4:
Winter frost ornament


Isn't it fabulous!  And it's easy with the festive flurry framelits for the Big Shot:


MORE SPARKLE!!!

Stampin' Up supplies used:
Paper: winter frost designer series paper, whisper white 8 1/2" x 11" card stock, silver  glimmer paper
Ink: coastal cabana, and pool party classic ink pad; pool party and island indigo marker
Big Shot: festive flurry thinlits die
adhesive: stampin' dimensionals, glue dots
embellishments: basic rhinestones, large rhinestones, frosted finishes
ribbon: pool party 1/2" seam binding ribbon

Details:
Cut base of ornament from striped winter frost paper.  Adhere large rhinestones to all points.  Stamp next largest snowflake with coastal cabana on whisper white paper and cut with framelit on Big Shot.  Cut silver snowflake with framelit. Color smallest snowflake with pool party and island indigo (in center). Adhere frosted finished embellishment with glue dot to center of smallest snowflake. Build them together with stampin' dimensionals.  pool party card stock at 5 1/2 and fold.  Cut designer paper 5 1/4" x 4" and layer with snail adhesive. Stamp snowflakes on whisper white paper and cut them out with the festive flurry framelits. The magnetic platform is a dream here!  Cut out silver snowflake with Big Shot. Adhere stamped snowflakes to card with snail adhesive and glittered snowflake with stampin' dimensionals. Loop and attach ribbon to back, tie another ribbon around and put a large rhinestone on it!  You can also punch out a large snowflake to back it so that the ribbon won't show. 
 
Stay tuned tomorrow for day #5. Missed day 1?  It's here.  Don't miss a day! subscribe to my blog today

Like papermadeprettier on Facebook and Pinterest!

Friday, November 8, 2013

12 days of Stampin' up Christmas projects from papermadeprettier, DAY 3

 
 Welcome to day 3!  I can almost hear the jingle bells jingling!
For me Christmas is about the birth of our savior Jesus Christ.

Day 3:
Christmas Blessings card


AND of course the lined envelope with the envelope liner die:


And no naked envelopes please!


Again with the sparkle??? I'm seeing a theme here! This is a simply elegant card that is easy to recreate for all of those you wish to bless this Christmas.

Stampin' Up supplies used:
Paper: winter frost designer series paper, whisper white and pool party 8 1/2" x 11" card stock, silver  glimmer paper
Ink: island indigo, smoky slate and pool party classic
Big Shot: festive flurry thinlits die, envelope liner die
adhesive: stampin' dimensionals, snail adhesive
embellishments: basic rhinestones, large rhinestones
other: whisper white envelopes


Details:
Cut base of pool party card stock at 5 1/2 and fold.  Cut designer paper 5 1/4" x 4" and layer with snail adhesive. Stamp snowflakes on whisper white paper and cut them out with the festive flurry framelits. The magnetic platform is a dream here!  Cut out silver snowflake with Big Shot.  Adhere stamped snowflakes to card with snail adhesive and glittered snowflake with stampin' dimensionals.  Stamp "Wishing you.." saying with island indigo in lower right corner. Embellish snowflakes with rhinestones. Cut envelope liner, stamp snowflakes on outside of whisper white envelope.
 
Stay tuned tomorrow for day #4. Don't miss a day! subscribe to my blog today

Like papermadeprettier on Facebook and Pinterest!

Thursday, November 7, 2013

12 days of Stampin' up Christmas projects from papermadeprettier, DAY 2


 Welcome back!
Christmas is all about giving gifts. You don't need to spend a fortune, just make this EASY gift box, fill it with homemade cookies, chex mix, socks, whatever and your recipient will LOVE IT! Go ahead and fill mine with Stampin' Up products, please :).  It's all about the packaging, which Stampin' Up makes cute and simple.

Day 2
Tag a Bag Gift Box:


Doesn't Christmas just call for sparkle???

Stampin' Up supplies used:
Tag a bag gift boxes
Paper: season of style designer series paper, whisper white 8 1/2" x 11" card stock, silver and red glimmer paper
Ink: cherry cobbler, gumball green markers. gumball green and chocolate chip classic stamp pad
Big Shot: circle card thinlits die (for the stars and ho ho ho frame pieces) OR holiday catalog carryover item (not pictured in catalog) merry minis punch pack can punch out the stars.
FOR A LINK TO HOLIDAY CARRYOVER ITEMS not listed in catalog CLICK HERE
tools: 2 2/8" scallop punch, stampin' sponge
embellishments: 3/4" cherry cobbler chevron ribbon, cherry cobbler baker's twine, basic rhinestones
adhesive: glue dots

Details:
Cut designer paper to fit across box and to fold 1 inch over the edge on each side, slide plastic sleeve over paper. Color stamp with cobbler and gumball green markers, stamp on whisper white card stock and punch out with scallop punch.  Place label thinlit from circle flip card thinlit die on back (white) side of silver glimmer paper and trace around the outside of the thinlit for the silver glimmer piece.  Cut white card stock with same label shape thinlit to get the shape with "ho ho ho" in it. Stamp "ho ho ho" in gumball green on the white cardstock piece and adhere to glitter outline piece with stampin' dimensional.  Cut stars with either merry minis punch pack star punch (carryover from catalog) or the circle card thinlits die star thinlit.  Attatch one to the other with glue dots.  Punch small hole in each of 3 labels, thread cherry cobbler twine through hold and attach it to the underside of the cherry cobbler cheveron bow. FILL WITH FUN!  The perfect gift!
 
 
Stay tuned tomorrow for day #3. Don't miss a day! subscribe to my blog today

Like papermadeprettier on Facebook and find me on Pinterest!

Saturday, November 2, 2013

5 Thankful days of Thanksgiving projects from papermadeprettier, project #10

LAST THANKFUL DAY!  If you missed the first 9 projects, click here: 5 Thankful Days Project #1.  I have posted two projects a day for 5 days so I hope you have enjoyed them!

DAY 5:
Project #10
THANKFUL BANNER
 
My fabulous upline Becky Liggin originally designed this banner which I made a tiny bit differently, but it is so beautiful, isn't it???
 
 
Here are some close ups!


 Bet you are wondering how I got those leaves on there. Becky had the fabulous idea to run a piece of acetate (overhead projector film, I think) through the BigShot to create a stencil, then I sponged colors onto the banner.

Here is the simply created banner kit used to make this precious banner.

 
FOR MORE BANNERS: VALENTINES, GO HOGS and JOY click here for my bannermania post

Stampin' Up supplies used:
Simply created banner kit
Thankful tablescape simply created kit (black chalkboard pieces)
paper: sweater weather designer series paper, tangerine tango, old olive, crushed curry, chocolate chip 8 1/2" x 11" cardstock, champagne glitter paper
Big Shot: autumn accents bigz die
ink: tangerine tango, always artichoke, chocolate chip, early espresso, sahara sand, crushed curry reinkers, chocolate chip classic stamp pad
other: sponge daubers, white stampin' chalk marker, stampin sponge

Details:
Use letter stencils to stencil "thankful" on  banners in early espresso ink. Squirt a little ink onto plastic lid or whatever you can find :).  (TIP: do not tap or dab, but use a little bit of ink at first and drag and rub the ink onto the banner. I had way more luck with this technique than using the sprayers).  Remember, you can always add, but you can not take away.  Sponge chevron, polka dot, strips and leaves on banners in same back and forth motion.  Let dry. Cut leaves out with autumn accents bigz die.  Cut acorns with champagne glimmer paper and autumn accents bigz die. Sponge edges of acorns with chocolate chip ink.  Write names on black chalkboard pieces with white chalk marker.  Cut strips of sweater weather and layer onto strips a little bit wider for pieces in between pennants, cut "v" in strips. For the strips between the banner pieces, make the strips a little longer and fold them over themselves on the back and tape leaving room for the jute to thread through.  Tie linen thread around acorns.  Layer leaves, acorns and black chalkboard pieces with glue dots. Thread jute twine through the pennants, starting from the front and going through the back on each pennant/paper strips.

Thanks for visiting my 5 Thankful Days.  Watch for a Christmas series in the future. Subscribe to my blog so you won't miss a thing!  www.papermadeprettier.com.

To order these fabulous products online anytime, go to my online store: http://www.stampinup.com/ECWeb/default.aspx?dbwsdemoid=2006013

Questions? Email me: Kay Cogbill, papermadeprettier Stampin' Up Demonstrator
cogbill22@yahoo.com

Friday, November 1, 2013

5 Thankful days of Thanksgiving projects from papermadeprettier, project #7

Hope you got enough candy last night! Welcome back!  If you missed the first 6 projects, click here: 5 Thankful Days Project #1.  I will post two projects a day for 5 days so that when you love them and want to make them, you will have plenty of time to make yours before the turkey comes to town! 

DAY 4:
Project #7
THANKFUL JOURNAL
 
 
I got this fabulous idea from convention. It's a stepped-up project using the Thankful Tablescape Simply Created Kit. Isn't it dreamy?  I love the way all of these elements meld together. Here are the inside pages with photos!


Stampin' Up supplies used: (all but the naturals designer buttons, Truly Grateful stamp set, chocolate chip ink and stampin' sponge to soften up the leaf cuts were from the Thankful Tablescape Simply Created kit!)
paper: whisper white 8 1/2" x 11", sweater weather designer series paper, If you don't have the kit (WHY DON'T YOU? IT ROCKS!) you can use sweater weather designer series paper and the autumn accents bigz die, however, the chalkboard cut out black pieces are exclusive to the kit.
stamp sets: Truly Grateful
Big Shot: autumn accents bigz die (if you don't use the kit), bitty banners thinlit
ink: chocolate chip
embellishments: naturals designer buttons
adhesives: snail adhesive, stampin' dimensionals
misc: stampin' sponge, white stampin' chalk marker?, metal rings x 2

Details:
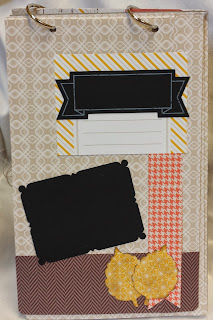
Cut cardboard piece that was in the Thankful Tablescape kit in half on the long end making the cardboard front and back covers (waste not, want not, right???).  Round the bottom edges with scissors.  Stack 2 halves back to back and punch 2 holes equal distance from edge through both halves (I used the cropadile tool - not Stampin' Up).  Front and back covers: cover front and back covers on both the front and back with the sahara sand/white paper. On front cover, layer a piece of birch paper.  Cut 1 strips of designer paper and cut the edge off of one of the "list" pieces with crushed curry diagonal stripes and cut an inverted "v" edge and layer the designer series papers strips.  Fold chocolate chip herringbone paper strip over on itself multiple times using glue dots on the inside to secure until it reaches from one side to the other, affix to front with glue dots.  Tie 3 pieces of linen thread around the journal in a bow.  Glue dot a naturals designer button on the knot of the bow.  Cut whisper white card stock using bitty banners thinlit die, stamp "thankful for" in chocolate chip ink. Write "journal" with stampin' chalk marker. Layer papers on other pages as desired.  Some examples are shown above.

DON'T miss project #8 this afternoon!  Subscribe to my blog so you won't miss a thing!  www.papermadeprettier.com.

To order these fabulous products online anytime, go to my online store: http://www.stampinup.com/ECWeb/default.aspx?dbwsdemoid=2006013

Questions? Email me: Kay Cogbill, papermadeprettier Stampin' Up Demonstrator
cogbill22@yahoo.com

Thursday, October 31, 2013

5 Thankful days of Thanksgiving projects from papermadeprettier, project #6

Ready to Trick or Treat?  HAPPY HALLOWEEN!  Thankful much?  I LOVE FALL!  If you missed the first 5 projects, click here: 5 Thankful Days Project #1.  I will post two projects a day for 5 days so that when you love them and want to make them, you will have plenty of time to make yours before the turkey comes to town! 

DAY 3:
Project #6
Maple Thanks Card:


This beauty was designed by Becky Liggin, my fabulous upline! and a rockin cool demonstrator. 
 
 Again, I love the Tags 4 You set in the holiday catalog since it covers all the most fabulous holidays this time of year and a little to:/from: stamp which is also fab. This is also coordinates with the label bracket punch which are bundled to save you 15%!!


Stampin' Up supplies used: (all but the solid papers were from Thankful Tablescape Simply Created kit)
paper: 8 1/2" x 11" chocolate chip, tangerine tango, very vanilla; sweater weather designer series paper.
stamp sets: Tags 4 you, magnificent maple (envelope)
Big Shot: wood grain embossing folder
ink: chocolate chip, tangerine tango
embellishments: 1 1/4" burlap ribbon (unravelled a tiny strip!)
tools:  label bracket punch
adhesives: snail adhesive, stampin' dimensionals
misc: stampin' sponge

Details:
Cut chocolate chip paper 5 1/2' x 4 1/4", fold in half.
These are the dimensions of the rest of the layers:
tangerine tango sweater weather paper houndstooth pattern 4" x 3"
herringbone strip sweater weather designer series paper 4" x 1" (or scroll from kit)
tangerine tango solid layer 2" x 3" (run through BigShot with woodgrain folder)
crushed curry sweater weather designer paper maple leaf die cut (either from kit or cut with autumn accents die)
Layer rectangles with snail adhesive, then center herringbone strip over the tango strip.  Stamp "Happy Thanksgiving" in tangerine tango on a very vanilla scrap, punch with label bracket punch. Adhere to card with stampin' dimensional. Sponge maple leaf with chocolate chip ink. Unravel a strip of the burlap ribbon and tie onto the stem of the leaf. Adhere to card with stampin' dimensionals

DON'T miss project #7 tomorrow!  Subscribe to my blog so you won't miss a thing!  www.papermadeprettier.com.

To order these fabulous products online anytime, go to my online store: http://www.stampinup.com/ECWeb/default.aspx?dbwsdemoid=2006013

Questions? Email me: Kay Cogbill, papermadeprettier Stampin' Up Demonstrator
cogbill22@yahoo.com

5 Thankful days of Thanksgiving projects from papermadeprettier, project #5

Are you enjoying these projects? I hope so! If you missed the first 2 projects, click here: 5 Thankful Days Project #1.  I will post two projects a day for 5 days so that when you love them and want to make them, you will have plenty of time to make yours before the turkey comes to town! 

DAY 3:
Project #5
Paper Pumpkin


This paper pumpkin was originally designed by Julie Davison, another very talented demonstrator. It is just so clever!  AND simple to make!
 
Stampin' Up supplies used:
paper: 8 1/2"x11" old olive card stock, sweater weather designer series paper. 
Big Shot: autumn accents bigz die
embellishments: glimmer brads (brights collection), linen thread, candy dot brad base
tools: paper piercing tool
adhesives: glue dots

Details:
Cut Designer paper into 10 strips 6"x1". Stack papers together, punch a small hole centered about 1/4" in from the end through them all (I use a large tool called a cropadile for that - not Stampin' Up). Stick brad through the end of one hole, colored glittery part facing up. Then fan out the pieces, bring them down to meet at the bottom and fasten from the bottom with the other brad. Cut olive colored leaves with Big Shot and autumn accents bigz die. Crumple and un-crumple the olive colored leaves.  Attach the leaves with glue dots and then tie the linen thread to the leaves. See? Simple!


DON'T miss project #6 this afternoon!  Subscribe to my blog so you won't miss a thing!  www.papermadeprettier.com.

To order these fabulous products online anytime, go to my online store: http://www.stampinup.com/ECWeb/default.aspx?dbwsdemoid=2006013

Questions? Email me: Kay Cogbill, papermadeprettier Stampin' Up Demonstrator
cogbill22@yahoo.com

Wednesday, October 30, 2013

5 Thankful days of Thanksgiving projects from papermadeprettier, project #3

Welcome back to my series of ten precious Stampin' Up Thanksgiving projects to wow amaze you. If you missed the first 2 projects, click here: 5 Thankful Days Project #1I will post two projects a day for 5 days so that when you love them and want to make them, you will have plenty of time to make yours before the turkey comes to town! 

DAY 2:
Project #3
Thankful Window Treat Box


This cute little bundle of chocolate love designed by hand stamped style and tweaked and copied by me :).  I am so THANKFUL for others who share their ideas on different sites.  I used the leaf and black place card label with chalkboard marker from the Simply Created Thankful Tablescape kit which I LOVE!!!  There's enough in that kit to create 10 place settings or to use the sweet items to make other things, which is what I did! 

(this is a bonus project, made entirely from the kit - except the cutie card which you will see later :)
 

Thankful Window Treat Box Stampin' Up supplies used:
paper: 8 1/2" x 11" crumb cake, sweater weather designer series paper leaf die cut from thankful tablescape kit (OR cut one out from the sweater weather paper and autumn accents bigz die), black chalkboard label
Big Shot: Thinlit circles collection
embellishments: cajun craze button (regals button collection),white stampin' chalk marker (sold separately or included in Thanksful Tablescape kit) linen thread (in kit or sold separately), envelope punch board.
adhesives: glue dots, sticky strip
 

Here's a cool tutorial about how to make the treat box with the envelope punch board (WHICH YOU NEED TO BUY!!!). Just goodle, Pinterest search Stampin' Up envelope punch board. The opportunities are endless!

Check out Stampin' Up's YouTube video about the fabulous envelope punch board: http://www.youtube.com/watch?v=JzokPixtpko

Details:
Create treat box using tutorial video instructions provided above.  Use big shot circles thinlit die to cut circle in the middle of the square part (you will need to make sure to cut only one side of your box, not the flaps - just face the flaps up and not towards cutting edge of thinlit, imagine the thinlit is inside the box).  Thread linen thread through button and tie bow. Adhere to leaf and then to box with glue dots.  I used a little cello bag and put M&M's from Target which were fall colored, then sticky strip taped the box shut.

DON'T miss project #4 this afternoon!  Subscribe to my blog so you won't miss a thing!  www.papermadeprettier.com.

To order these fabulous products online anytime, go to my online store: http://www.stampinup.com/ECWeb/default.aspx?dbwsdemoid=2006013

Questions? Email me: Kay Cogbill, papermadeprettier Stampin' Up Demonstrator

Tuesday, October 29, 2013

5 Thankful days of Thanksgiving projects from papermadeprettier, project #2

Welcome back to my series of ten precious Stampin' Up Thanksgiving projects to wow amaze you. If you missed the first project, click here: 5 Thankful Days Project #1.  I will post two projects a day for 5 days so that when you love them and want to make them, you will have plenty of time to make yours before the turkey comes to town! 
 
SUBSCRIBE TO MY BLOG DURING THIS SERIES AND I WILL EMAIL YOU A PDF WITH INSTRUCTIONS FROM ALL OF THE PROJECTS LISTED HERE!!!

DAY 1:
Project #2
Truly Grateful Card:


This SIMPLE card I copied straight out of the Stampin' Up holiday catalog. In fact, it's why I bought this set called Truly Grateful.


Stampin' Up supplies used:
paper: 8 1/2" x 11"  whisper white, soft sky card stock, sweather weather designer series paper.
stamp set: Truly Grateful, Gorgeous Grunge
ink: crushed curry, pumpkin pie, basic black, early espresso
accessories: (Big Shot: envelope liner framelits), owl punch (for little heart!)
embellishments: witches brew designer washi tape
other: Stampin Up' medium whisper white envelope, glue dots, snail adhesive
 
Project Details:
THIS IS A VERY SIMPLE CARD!!!  Cut whisper white card stock at 5 1/2" x 4 1/4", fold in half for base.  Stamp background x2 with crushed curry ink (stacking one over the other).  Stamp wheat bunch in early espresso, stamp slotchy splatters with pumpkin pie (Gorgeous Grunge stamp set).  Tear and adhere washi tape across card. Stamp "truly grateful" with basic black ink. (careful to le tthis dry before touching it. Our basic black is a permanent ink, other classic ink pads would just rub off the washi tape, but the basic black ink will dry permanent. Cut a tiny strip of soft sky and adhere with snail adhesive. Punch a tiny heart of soft sky paper with owl punch and either glue dot or snail adhesive it to the card.
Cut envelope liner on Big Shot using the envelope liner die. You are done! EASY!

Check out Stampin' Up's YouTube video about the fabulous envelope punch board: http://www.youtube.com/watch?v=JzokPixtpko

DON'T miss project #3 tomorrow!  Subscribe to my blog so you won't miss a thing!  www.papermadeprettier.com.

To order these fabulous products online anytime, go to my online store: http://www.stampinup.com/ECWeb/default.aspx?dbwsdemoid=2006013

Questions? Email me: Kay Cogbill, papermadeprettier Stampin' Up Demonstrator

5 Thankful Days of Thanksgiving projects from papermadeprettier: Project #1


Welcome to my series of ten precious Stampin' Up Thanksgiving projects over 5 days to wow amaze you!  My name is Kay Cogbill, I am a Stampin' Up demonstrator and I am here to wow you with my Thanksgiving eye candy. Don't you find that Thanksgiving decor is often snuggled on the endcap of the aisle between the Halloween candy and Christmas goodies?  Thanksgiving is about being with those that we love an being thankful for them. What better way to show them you care than a handmade card or gift? These projects are EASY TO MAKE and FABULOUS and are all available through my online store.  I found most of these projects on Pinterest and sometimes tweaked them with a little papermadeprettier sparkle and dazzle. I will post two projects a day for 5 days so that when you love them and want to make them, you will have plenty of time to make yours before the turkey comes to town! 

SUBSCRIBE TO MY BLOG DURING THIS SERIES AND I WILL EMAIL YOU A PDF WITH INSTRUCTIONS FROM ALL OF THE PROJECTS LISTED HERE!!!

DAY 1
Pumpkin Treat Box:


This beauty was inspired by Debbie Henderson, who indicated on her blog that it was inspired by others on Stampin' Connection. Either way, it's fabulous!!! I added a little sparkle with the champagne glitter paper paper, LOVE!

Stampin' Up supplies used both from annual and holiday catalogs:
paper: 8 1/2 x 11 pumpkin pie card stock, champagne glimmer paper.
ink: early espresso.
Big Shot: circles collection thinlits, autumn accents bigz die, chevron embossing folder. embellishments: burlap ribbon, gumball green 3/8 " stitched satin ribbon, early espresso button (neutrals collection), linen thread.
adhesives: sticky strip adhesive, glue dots
other: stampin' sponge

Project details:
Use circles thinlit to cut the large scalloped circle. Run these each through the bigshot in the chevron embossing folder.  Trim off the edge of both.  The box inside is made with a piece of pumpkin pie card stock cut at 5" x 5 1/2". Score long edge 1 inch in from edge on both sides. Score short side 2 inches in on either side.

Fold into a rectangular box and affix with double stick tape or sticky strip.  Use glue dots to affix gumball green ribbon to burlap ribbon and glue these to the inside of the pumpkin with sticky strip.  Cut champagne glittered leaves with autumn accents die. I sponged the edges of the glittery leaves with chocolate chip ink, just needed softening, I though. Thread linen thread through the early espresso button, adhere to the leaves with glue dots and adhere leaves with glue dots to the front of the pumpkin. PRECIOUS, RIGHT???

DON'T miss project #2 later today!  Subscribe to my blog so you won't miss a thing!  www.papermadeprettier.com.

To order these fabulous products online anytime, go to my online store: http://www.stampinup.com/ECWeb/default.aspx?dbwsdemoid=2006013

Questions? Email me: Kay Cogbill, papermadeprettier Stampin' Up Demonstrator


Related Posts Plugin for WordPress, Blogger...