Showing posts with label Thanksgiving. Show all posts

Sunday, August 23, 2020

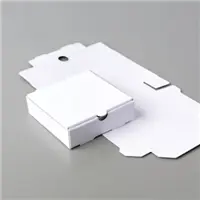
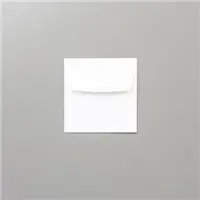
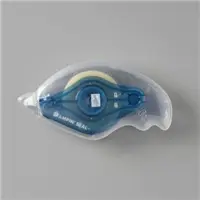
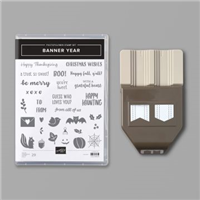
Banner Year 3" x 3" holiday card gift box


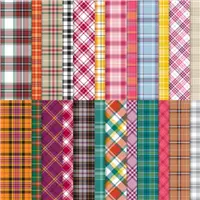
When you have a stamp set as cute as Banner year, you gotta create some projects to do it justice. This box of 3x3" cards is just the ticket for adorable, holiday cuteness. Can you imagine a friend who needs a pick me up? This is the perfect gift! A box of holiday cards!  I listed the inks used below, but you can always sub the inks you have, however, you WILL need the plaid paper too. 

Banner year is a bundle which means it's 10% off! See below to order! 

Dimensions:
Thick Whisper White: 6 x 3" scored at 3"
Whisper White labels 3/4 x 3" (x2 - one for card and one for top of box), 3/4 x 3" (x3)
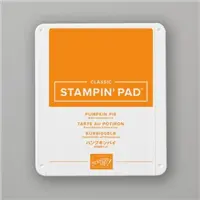
Pumpkin Pie: 3/4/x 3"
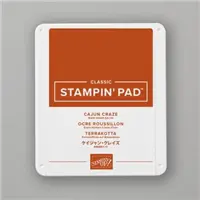
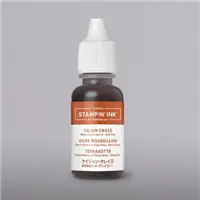
Cajun Craze 3/4" x 3"
Real Red 3/4" x 3"
Real Red 1 x 3"
Designer Series Paper for top of box 3 1/4 x 3 1/4" 
Designer Series Paper Strips 3/4" x 3"

Saturday, November 2, 2013

5 Thankful days of Thanksgiving projects from papermadeprettier, project #10

LAST THANKFUL DAY!  If you missed the first 9 projects, click here: 5 Thankful Days Project #1.  I have posted two projects a day for 5 days so I hope you have enjoyed them!

DAY 5:
Project #10
THANKFUL BANNER
 
My fabulous upline Becky Liggin originally designed this banner which I made a tiny bit differently, but it is so beautiful, isn't it???
 
 
Here are some close ups!


 Bet you are wondering how I got those leaves on there. Becky had the fabulous idea to run a piece of acetate (overhead projector film, I think) through the BigShot to create a stencil, then I sponged colors onto the banner.

Here is the simply created banner kit used to make this precious banner.

 
FOR MORE BANNERS: VALENTINES, GO HOGS and JOY click here for my bannermania post

Stampin' Up supplies used:
Simply created banner kit
Thankful tablescape simply created kit (black chalkboard pieces)
paper: sweater weather designer series paper, tangerine tango, old olive, crushed curry, chocolate chip 8 1/2" x 11" cardstock, champagne glitter paper
Big Shot: autumn accents bigz die
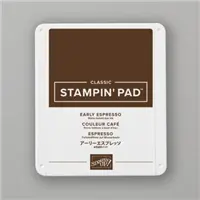
ink: tangerine tango, always artichoke, chocolate chip, early espresso, sahara sand, crushed curry reinkers, chocolate chip classic stamp pad
other: sponge daubers, white stampin' chalk marker, stampin sponge

Details:
Use letter stencils to stencil "thankful" on  banners in early espresso ink. Squirt a little ink onto plastic lid or whatever you can find :).  (TIP: do not tap or dab, but use a little bit of ink at first and drag and rub the ink onto the banner. I had way more luck with this technique than using the sprayers).  Remember, you can always add, but you can not take away.  Sponge chevron, polka dot, strips and leaves on banners in same back and forth motion.  Let dry. Cut leaves out with autumn accents bigz die.  Cut acorns with champagne glimmer paper and autumn accents bigz die. Sponge edges of acorns with chocolate chip ink.  Write names on black chalkboard pieces with white chalk marker.  Cut strips of sweater weather and layer onto strips a little bit wider for pieces in between pennants, cut "v" in strips. For the strips between the banner pieces, make the strips a little longer and fold them over themselves on the back and tape leaving room for the jute to thread through.  Tie linen thread around acorns.  Layer leaves, acorns and black chalkboard pieces with glue dots. Thread jute twine through the pennants, starting from the front and going through the back on each pennant/paper strips.

Thanks for visiting my 5 Thankful Days.  Watch for a Christmas series in the future. Subscribe to my blog so you won't miss a thing!  www.papermadeprettier.com.

To order these fabulous products online anytime, go to my online store: http://www.stampinup.com/ECWeb/default.aspx?dbwsdemoid=2006013

Questions? Email me: Kay Cogbill, papermadeprettier Stampin' Up Demonstrator
cogbill22@yahoo.com

Friday, November 1, 2013

5 Thankful days of Thanksgiving projects from papermadeprettier, project #8

Hope you got enough candy last night! Welcome back!  If you missed the first 7 projects, click here: 5 Thankful Days Project #1.  I will post two projects a day for 5 days so that when you love them and want to make them, you will have plenty of time to make yours before the turkey comes to town! 

DAY 4:
Project #8
Mod Thanksgiving Card


I love this simple, simple card that can be made with very few supplies.  AND you can change it up for other holidays. And washi tape - LOVE!!!

Stampin' Up supplies used:
paper: whisper white and crumb cake 8 1/2" x 11",
stamp sets: Tags for all (see more on this set from a previous post here), Gorgeous Grunge (splatters)
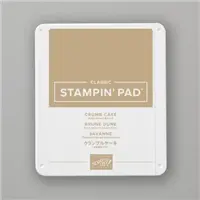
ink: crumb cake, pumpkin pie
embellishments: witches brew designer washi tape, gingham garden designer washi tape, season of style designer washi tape
tools: label bracket punch
adhesives: snail adhesive, stampin' dimensionals

Details:
Cut whisper white piece 5 1/2" x 4 1/4, fold for base.  Adhere washi tape trimming ends diagonally.  Stamp big splatter in crumb cake ink and little splatter in pumpkin pie ink. Punch crumb cake with label bracket punch. Stamp "happy Thanksgiving" with pumpkin pie ink on white card stock, punch out with bracket label punch and trim the edge off.  Adhere to crumb cake punch out with stampin' dimensional and then use snail adhesive to affix to card in lower right corner. EASY! YES!

DON'T miss project #9 and 10 tomorrow. They are my favorites and will blow your mind with cuteness!  Subscribe to my blog so you won't miss a thing!  www.papermadeprettier.com.

To order these fabulous products online anytime, go to my online store: http://www.stampinup.com/ECWeb/default.aspx?dbwsdemoid=2006013

Questions? Email me: Kay Cogbill, papermadeprettier Stampin' Up Demonstrator
cogbill22@yahoo.com

5 Thankful days of Thanksgiving projects from papermadeprettier, project #7

Hope you got enough candy last night! Welcome back!  If you missed the first 6 projects, click here: 5 Thankful Days Project #1.  I will post two projects a day for 5 days so that when you love them and want to make them, you will have plenty of time to make yours before the turkey comes to town! 

DAY 4:
Project #7
THANKFUL JOURNAL
 
 
I got this fabulous idea from convention. It's a stepped-up project using the Thankful Tablescape Simply Created Kit. Isn't it dreamy?  I love the way all of these elements meld together. Here are the inside pages with photos!


Stampin' Up supplies used: (all but the naturals designer buttons, Truly Grateful stamp set, chocolate chip ink and stampin' sponge to soften up the leaf cuts were from the Thankful Tablescape Simply Created kit!)
paper: whisper white 8 1/2" x 11", sweater weather designer series paper, If you don't have the kit (WHY DON'T YOU? IT ROCKS!) you can use sweater weather designer series paper and the autumn accents bigz die, however, the chalkboard cut out black pieces are exclusive to the kit.
stamp sets: Truly Grateful
Big Shot: autumn accents bigz die (if you don't use the kit), bitty banners thinlit
ink: chocolate chip
embellishments: naturals designer buttons
adhesives: snail adhesive, stampin' dimensionals
misc: stampin' sponge, white stampin' chalk marker?, metal rings x 2

Details:
Cut cardboard piece that was in the Thankful Tablescape kit in half on the long end making the cardboard front and back covers (waste not, want not, right???).  Round the bottom edges with scissors.  Stack 2 halves back to back and punch 2 holes equal distance from edge through both halves (I used the cropadile tool - not Stampin' Up).  Front and back covers: cover front and back covers on both the front and back with the sahara sand/white paper. On front cover, layer a piece of birch paper.  Cut 1 strips of designer paper and cut the edge off of one of the "list" pieces with crushed curry diagonal stripes and cut an inverted "v" edge and layer the designer series papers strips.  Fold chocolate chip herringbone paper strip over on itself multiple times using glue dots on the inside to secure until it reaches from one side to the other, affix to front with glue dots.  Tie 3 pieces of linen thread around the journal in a bow.  Glue dot a naturals designer button on the knot of the bow.  Cut whisper white card stock using bitty banners thinlit die, stamp "thankful for" in chocolate chip ink. Write "journal" with stampin' chalk marker. Layer papers on other pages as desired.  Some examples are shown above.

DON'T miss project #8 this afternoon!  Subscribe to my blog so you won't miss a thing!  www.papermadeprettier.com.

To order these fabulous products online anytime, go to my online store: http://www.stampinup.com/ECWeb/default.aspx?dbwsdemoid=2006013

Questions? Email me: Kay Cogbill, papermadeprettier Stampin' Up Demonstrator
cogbill22@yahoo.com
Thursday, October 31, 2013

5 Thankful days of Thanksgiving projects from papermadeprettier, project #5

Are you enjoying these projects? I hope so! If you missed the first 2 projects, click here: 5 Thankful Days Project #1.  I will post two projects a day for 5 days so that when you love them and want to make them, you will have plenty of time to make yours before the turkey comes to town! 

DAY 3:
Project #5
Paper Pumpkin


This paper pumpkin was originally designed by Julie Davison, another very talented demonstrator. It is just so clever!  AND simple to make!
 
Stampin' Up supplies used:
paper: 8 1/2"x11" old olive card stock, sweater weather designer series paper. 
Big Shot: autumn accents bigz die
embellishments: glimmer brads (brights collection), linen thread, candy dot brad base
tools: paper piercing tool
adhesives: glue dots

Details:
Cut Designer paper into 10 strips 6"x1". Stack papers together, punch a small hole centered about 1/4" in from the end through them all (I use a large tool called a cropadile for that - not Stampin' Up). Stick brad through the end of one hole, colored glittery part facing up. Then fan out the pieces, bring them down to meet at the bottom and fasten from the bottom with the other brad. Cut olive colored leaves with Big Shot and autumn accents bigz die. Crumple and un-crumple the olive colored leaves.  Attach the leaves with glue dots and then tie the linen thread to the leaves. See? Simple!


DON'T miss project #6 this afternoon!  Subscribe to my blog so you won't miss a thing!  www.papermadeprettier.com.

To order these fabulous products online anytime, go to my online store: http://www.stampinup.com/ECWeb/default.aspx?dbwsdemoid=2006013

Questions? Email me: Kay Cogbill, papermadeprettier Stampin' Up Demonstrator
cogbill22@yahoo.com

Wednesday, October 30, 2013

5 Thankful days of Thanksgiving projects from papermadeprettier, project #4

Welcome back to my series of ten precious Stampin' Up Thanksgiving projects to wow amaze you. If you missed the first 2 projects, click here: 5 Thankful Days Project #1.  I will post two projects a day for 5 days so that when you love them and want to make them, you will have plenty of time to make yours before the turkey comes to town! 

DAY 2:
Project #4
Happy Thanksgiving Card:


This 5"x5" beauty was designed by Mary Fish, another very talented demonstrator.  I had to copy it exactly because it was so beautiful. My favorite part of the card is the envelope made with our envelope punch board and lined with the fabulous sweater weather designer series paper. Also, see how she had the idea to pinch the image in crushed curry, trim out the "thanks" word adhere to the punched image? Brilliant!

 
I might add, the Tags 4 You is my favorite set in the holiday catalog since it covers all the most fabulous holidays this time of year and a little to:/from: stamp which is also fab. This is also coordinates with the label bracket punch which are bundled to save you 15%!!


Stampin' Up supplies used:
paper: 8 1/2" x 11" chocolate chip, very vanilla cardstock, sweater weather designer series paper. stamp set: Tags 4 you.
ink: chocolate chip, crushed curry
embellishments: chocolate chip button (neutrals collection), 1 1/4" burlap ribbon
tools: envelope punch board, label bracket punch
adhesives: snail adhesive, glue dots, stampin' dimensionals

Check out Stampin' Up's YouTube video about the fabulous envelope punch board: http://www.youtube.com/watch?v=JzokPixtpko

Details:
Cut chocolate chip paper 5 1/2 x 11, fold in half.  These are the dimensions of the rest of the layers:
tangerine tango sweater weather paper 4 1/4" x 4 1/4"
very vanilla paper: 4" x 4"
crushed curry sweater weather designer paper 3 1/2" x 3 1/2"
herringbone strip sweater weather 3 1/8" x 1"
tangerine tango sweater weather strip 3 x 3 3/4"
Layer papers with snail adhesive, cut a triangle out of the end of your strips (have a square punch? This works great - or fold and freehand like me!).  Layer strips with snail. cut burlap ribbon narrower and layer with tape or glue dots.  Stamp Tags 4 U "Happy Thanksgiving" in both chocolate chip and crushed curry. Punch chocolate chip with the label bracket punch. Trim the "thanks" with scissors out of the crushed curry stamped image and use snail to adhere to the punch.  Adhere to card with stampin dimensional (I only used on one side since the ribbon forced the other side up a little). Now finish it off with a precious chocolate chip button!  Mary used the fabulous antique brads which I did not have, so I guess I fibbed. I did not copy exactly!!!
See video for envelope punch board. I just made a smaller envelope to put inside the larger envelope with the punch board.

DON'T miss project #5 tomorrow!  Subscribe to my blog so you won't miss a thing!  www.papermadeprettier.com.

To order these fabulous products online anytime, go to my online store: http://www.stampinup.com/ECWeb/default.aspx?dbwsdemoid=2006013

Questions? Email me: Kay Cogbill, papermadeprettier Stampin' Up Demonstrator
cogbill22@yahoo.com
Related Posts Plugin for WordPress, Blogger...