Showing posts with label Christmas. Show all posts

Sunday, August 23, 2020

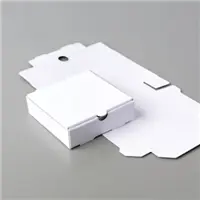
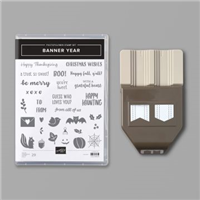
Banner Year 3" x 3" holiday card gift box


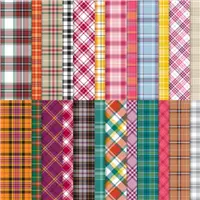
When you have a stamp set as cute as Banner year, you gotta create some projects to do it justice. This box of 3x3" cards is just the ticket for adorable, holiday cuteness. Can you imagine a friend who needs a pick me up? This is the perfect gift! A box of holiday cards!  I listed the inks used below, but you can always sub the inks you have, however, you WILL need the plaid paper too. 

Banner year is a bundle which means it's 10% off! See below to order! 

Dimensions:
Thick Whisper White: 6 x 3" scored at 3"
Whisper White labels 3/4 x 3" (x2 - one for card and one for top of box), 3/4 x 3" (x3)
Pumpkin Pie: 3/4/x 3"
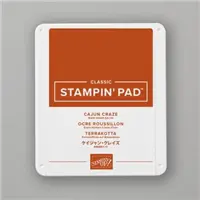
Cajun Craze 3/4" x 3"
Real Red 3/4" x 3"
Real Red 1 x 3"
Designer Series Paper for top of box 3 1/4 x 3 1/4" 
Designer Series Paper Strips 3/4" x 3"

Monday, August 10, 2020

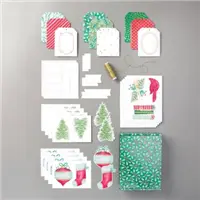
Aug-Dec 2020 Mini Holiday Catalog is HERE! Catalog Walk through with 36 samples and Tags Buffet Demo


Wow. I'd say we all NEED a little Christmas right now. This catalog has me singing in my head every day. I love all the holidays - Halloween, Thanksgiving and Christmas. I have sooooooo much to show you already since I was able to order from this catalog a few months ago as a demonstrator.  Join me on a walk through through the catalog. You'll see

  • 36 Holiday Catalog Samples
  • A demonstration of the amazing Tags Buffet Kit


Click here to shop my online store and Holiday Catalog today

Here is a PDF link to the Holiday Catalog

Email me if you'd like a catalog and don't already have a Stampin' Up demonstrator!

Click below to purchase the kit featured in the video

Monday, November 25, 2013

Easy DIY Christmas gift with Stampin' Up's owl punch!

I just love sprucing up dollar items with pretty paper for gifts. I made these for my fabulous pretties, my downline demos for our event this weekend.  Ariana Benitez inspired me with her cutie tags using the owl punch. Aren't they just so stinkin' cute?  Can you say TEACHER GIFT??? Don't get me started on all the cute things people have made with this owl punch on Pinterest.

 
Stampin' Up Supplies used:
paper: real red, basic black and whisper white card stock
stamp set:  Oh Goodie!
Big Shot: northern flurry embossing folder, labels collection framelits
embellishements: cherry cobbler baker's twine, basic rhinestones
adhesives: snail adhesive
 
OWL PUNCH $16.95
 
 
Order this and other stampin' supplies here at my online store 24/7.

Come to one of my events in Little Rock, Arkansas:

Like papermadeprettier on Facebook and Pinterest!
 

Thursday, November 21, 2013

Mosaic Madness Christmas Card, Stampin' Up

 
I LOVE the versatility of this set.  In the next few posts, you will see it too! I created this beauty with inspiration from a card on Pinterest from Lynn Weiss with few tweaks.
 
 
Mosaic Madness Christmas:


Stampin' Up Supplies used:
paper: cherry cobbler old olive, whisper white 8 1/2 x 11 paper, season of style designer series paper
stamps sets: Mosaic Madness, Merry Little Christmas
Big Shot: modern mosaic embossing folder
tools: mosaic punch, 3/4" circle punch, itty bitty shapes punch pack
ink: old olive and cherry cobbler classic stamp pad
embellishments: basic rhinestones, season of style washi tape

For more Christmas fun, check out 12 days of Christmas

For more mosaics, check this out!

Order stampin' supplies here at my online store 24/7.

Like papermadeprettier on Facebook and Pinterest!

Friday, November 15, 2013

12 days of Stampin' up Christmas projects from papermadeprettier, DAY 10

Now this card takes sparkle to a whole 'nother level. Get your sunglasses on for this STUNNING card. My friend at work, Cindy Egbert made this at another fab Stampin' Up demo Tracey Thompson's class.  This card is simple and fabulous. 


Day 10:
Golden Calm Christmas


 Stampin' Up supplies used:
Paper: baked brown sugar and very vanilla 8 1/2" x 11" card stock; champagne glimmer paper
Stamp set: Calm Christmas
Ink: baked brown sugar classic ink pad
embellishments: in color boutique details
ribbon: baked brown sugar 3/8" ruffle stretch trim
adhesives: snail adhesive, glue dots
 
Details:
Cut baked brown sugar at 5 1/2" on long end and fold. Cut very vanilla 3 1/2" x 3 1/2". Stamp dove and "peace on earth" with baked brown sugar.  Cut baked brown sugar piece at 3 3/4" x 3 3/4". Affix vanilla piece to the brown sugar square with snail adhesive.  Cut champagne glimmer paper at 5 1/4" x 4" and attach to base with snail adhesive.  Wrap ruffle stretch trim and tape at back. Affix square and boutique detail embellishment with glue dots. SIMPLE SPARKLY and FABULOUS!

Missed day 1?  It's here.  Don't miss a day! subscribe to my blog today

Order stampin' supplies here at my online store 24/7.

Like papermadeprettier on Facebook and Pinterest!

Wednesday, November 13, 2013

12 days of Stampin' up Christmas projects from papermadeprettier, DAY 8

The suspense is over, here's what was in yesterday's bag. Beautiful cards!  I made these at my downline Becky Liggin's stamp camp. Aren't they fabulous? The frosted finishes embellishments are the perfect embellishment for these fabulous cards.


Day 8:
Joyful Christmas Poinsettia Christmas cards


 Stampin' Up supplies used:
Paper: chocolate chip, old olive, cherry cobbler and whisper white 8 1/2" x 11" card stock; season of style designer series paper, Regals core'dinations card stock (cherry cobbler)
Stamp set: Joyful Christmas
Ink: cherry cobbler, old olive classic stampin' pads, white craft pad (or metallic encore silver pad if you don't have the old white pad)
Big Shot: pretty print and petals a plenty textured impressions embossing folders, apothecary accents framelit
embellishments: frosted finishes embellishments, basic rhinestones
ribbon: cherry cobbler baker's twine
adhesives: snail adhesive, stampin' dimensionals, glue dots
other: season of style washi tape, gingham garden washi tape, blender pens, stampin' sponge, stampin' sanding block
 
Details:
Details:
cherry cobbler base cut 5 1/2" on long end and fold
old olive 5 1/2 " x 3 3/4", emboss with petals a plenty embossing folder
red/white striped season of style 4 1/2" x 2 1/4"
whisper white rectangle: 2 1/2" x 1 1/2", stamp with saying and sponge cherry cobbler ink on edges
stamp whisper white onto cherry cobbler and trim with scissors. Embellish with frosted finishes using a glue dot. Wrap cherry cobbler around olive piece 3x and then tie in a bow. Layer all pieces with snail adhesive, except on rectangle square, use stampin' dimensionals.

Details:
Cut chocolate chip on long end at 5 1/2" and fold
Whisper white layer 4" x 4", emboss with pretty print embossing folder
Season of style striped paper: 4" x 1 1/2"
rectangles: cherry cobbler: 2 1/2" x 1 1/2", whisper white: 2 1/4" x 1 1/4"
stamp whisper white with "joyful" using cherry cobbler ink.  Stamp whisper white onto cherry cobbler for poinsettias and old olive with leaves and cut with scissors. Layer white and striped piece using season of style washi tape where they meet. Layer the rest with snail adhesive except poinsettia using stampin' dimensionals.  Embellish flower with frosted finishes embellishment.

Details:
Cut cherry cobbler at 5 1/2" on long end and fold.  Cut old olive at 5 1/4" x 4". Cut whisper white at
5" x 3 3/4".  Cut cherry cobbler piece behind white rectangle using apothecary accents framelit, cut strip of cherry cobbler 5" x 1/2", cut striped piece 5" x 1"
Stamp large white piece with poinsettia stamp using cherry cobbler ink. Use cherry cobbler ink and blender pen to color the poinsettias.  Color center with old olive ink. Embellish one with basic rhinestone and one with frosted finishes embellishment.  Stamp "Joyful..." with cherry cobbler and layer onto apothecary accents piece then layer all pieces with snail adhesive.

Details:
Cut old olive piece at 5 1/2" on long end and fold.  Cut cherry cobbler core'dinations card stock piece at 5 1/4" x 4", emboss with pretty print embossing folder. Sand with stampin' sanding block.  Adhere gingham garden washi tape across cobbler piece.  Cut white rectangle at 3 1/4" x 3". Stamp with leaves and "joyful" using old olive and cherry cobbler ink.  Edge with washi tape, embellish with frosted finishes using a glue dot.  Layer all with snail adhesive.


Missed day 1?  It's here.  Don't miss a day! subscribe to my blog today

Order stampin' supplies here at my online store 24/7.

Like papermadeprettier on Facebook and Pinterest!
Related Posts Plugin for WordPress, Blogger...